Product Installation Overview
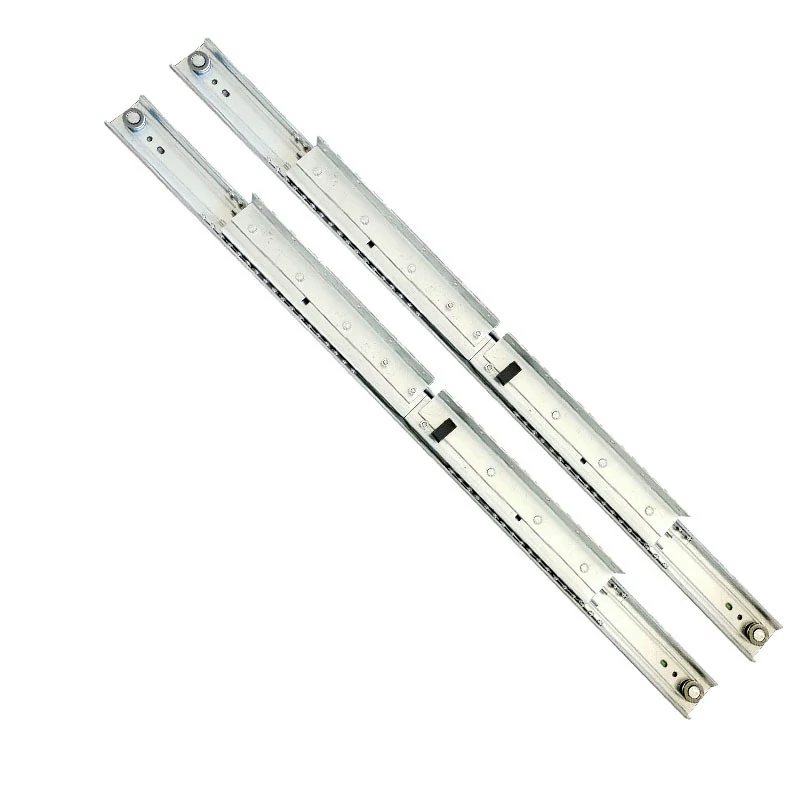
Telescopic Drawer Slide installation requires slide length selection, parallel cabinet member layout, drawer member alignment, side clearance control, and smooth extension testing in the Drawer Slides and Drawer Systems assembly.
For B2B furniture production, use this Telescopic Drawer Slide guide to standardize marking, drilling, mounting, fastening, and final inspection before the hardware is approved for cabinet, panel, or furniture assembly.
This is only a simple installation tutorial. Specific adjustments should be made according to the actual furniture, panel material, and hardware specifications.
- Product
- Telescopic Drawer Slide
- Category
- Drawer Slides and Drawer Systems
- Installation profile
- Drawer Slide Installation
- Priority
- 95
Industry Data
Use these installation signals to prepare tools, verify measurements, and avoid common alignment or fastening mistakes before production use.
- Tools to prepare: tape measure, pencil, level, drill and screwdriver Prepare these before drilling or fastening the hardware.
- Measurement checks: slide length, drawer depth, side clearance and load capacity Confirm these measurements against the panel, door, drawer, or frame before installation.
- Hardware and supplies: Telescopic Drawer Slide, cabinet member screws and drawer member screws Check compatibility with the actual furniture material and order specification.
- Step sequence: Measure drawer depth and select a suitable slide length, Mark level reference lines inside the cabinet, Mount the cabinet members on both sides, Mount the drawer members on the drawer box and Insert the drawer and test extension Follow the sequence so alignment errors are caught before final tightening.
Detailed Telescopic Drawer Slide Installation Tutorial
Before You Start
Before installing Telescopic Drawer Slide, dry-fit Telescopic Drawer Slide on the furniture part and confirm the slide length reference. Mark from one clean datum edge, not from a damaged corner, so repeated pieces land in the same position. Check drawer box width, cabinet opening, slide length, and side clearance before fixing either member.
Installation Method
During the Telescopic Drawer Slide work, use tape measure first, then drill or fasten gradually. Keep the hardware square to the panel, leave adjustment screws loose until alignment is checked, and compare the result with the Drawer Slide Installation profile requirements. Mount cabinet members level and parallel, then attach drawer members at matching heights.
Final Check
After Telescopic Drawer Slide is mounted, operate, pull, load, or lock the part in the same direction a user will use it. Recheck gaps, screw seating, clearance, and surface damage before approving the Telescopic Drawer Slide installation for production. Run the drawer through full travel with load and check that the face reveal stays even.
Visual Step-by-Step Installation Guide
Step 1 of 6: Measure drawer depth and select a suitable slide length
Step by Step Installation Instructions
-
1
Measure drawer depth and select a suitable slide length For Telescopic Drawer Slide, mark cabinet member height and drawer member height from the same front reference. Use tape measure for this operation and keep "slide length" as the main measurement check. Keep Telescopic Drawer Slide in position without fully forcing it until the alignment is verified. Before moving to the next step, confirm left and right slide lines are level, parallel, and equal in setback.
-
2
Mark level reference lines inside the cabinet For Telescopic Drawer Slide, pre-drill screw holes or pilot marks without letting the bit wander. Use pencil for this operation and keep "drawer depth" as the main measurement check. Keep cabinet member screws in position without fully forcing it until the alignment is verified. Before moving to the next step, confirm pilot holes are centered in the slide slots and do not enter the drawer path.
-
3
Mount the cabinet members on both sides For Telescopic Drawer Slide, install cabinet members first and keep them parallel front to back. Use level for this operation and keep "side clearance" as the main measurement check. Keep drawer member screws in position without fully forcing it until the alignment is verified. Before moving to the next step, confirm both cabinet members sit at the same height and depth.
-
4
Mount the drawer members on the drawer box For Telescopic Drawer Slide, attach drawer members at matching heights and use slot holes for first alignment. Use drill for this operation and keep "load capacity" as the main measurement check. Keep Telescopic Drawer Slide in position without fully forcing it until the alignment is verified. Before moving to the next step, confirm screw heads are seated below the moving rail path.
-
5
Insert the drawer and test extension For Telescopic Drawer Slide, insert the drawer and adjust the front reveal before final screw tightening. Use screwdriver for this operation and keep "extension length" as the main measurement check. Keep cabinet member screws in position without fully forcing it until the alignment is verified. Before moving to the next step, confirm the drawer face is even and slide movement does not bind.
-
6
Adjust alignment and check smooth travel under load For Telescopic Drawer Slide, cycle the drawer fully open and closed under the expected load. Use spacer block for this operation and keep "mounting height" as the main measurement check. Keep drawer member screws in position without fully forcing it until the alignment is verified. Before moving to the next step, confirm extension, close, and load movement are smooth from end to end.
Common Installation Mistakes
- Installing Telescopic Drawer Slide with unequal side clearance.
- Mounting cabinet members out of level or not parallel.
- Using drawer screws that interfere with slide travel.
- Skipping the loaded extension test.
Safety and Installation Warnings
- Both sides must be parallel and level
- incorrect clearance causes binding.
- Keep both slide members parallel; small alignment errors can cause binding.
Adjustment or Testing Notes
- Open and close Telescopic Drawer Slide through full travel and listen for binding.
- Check reveal and drawer face alignment after both members are engaged.
- Test movement under expected drawer load.
Installation FAQ
What tools are needed to install Telescopic Drawer Slide?
Typical tools include tape measure, pencil, level, drill, screwdriver. For production work, add jigs, depth stops, or templates when repeatable positioning is required.
What measurements should be checked before installing Telescopic Drawer Slide?
Check slide length, drawer depth, side clearance, load capacity, extension length before drilling or fastening. Confirm dimensions against the product drawing and panel thickness.
Can Telescopic Drawer Slide be installed in MDF or plywood furniture?
Most furniture hardware can be installed in MDF, plywood, particle board, or solid wood when the pilot hole, screw length, load rating, and tightening torque match the material.
What is the most common installation mistake for Telescopic Drawer Slide?
Installing Telescopic Drawer Slide with unequal side clearance.
Can Telescopic Drawer Slide be ordered for bulk furniture production?
Yes. Use the guide to define installation drawings, samples, tooling, and inspection standards before bulk furniture hardware production.